This post may contain affiliate links. If you purchase through these links, I may receive a small commission at no cost to you. Learn more.
Pilea or “Chinese evergreen” is a perfect houseplant for beginners. It doesn’t need much attention, and it can grow well in low-light conditions. The best part? Pileas are easy to propagate from leaves! In this article, we will walk you through the steps of propagating a pilea plant from one leaf into many plants so that you’ll never have to buy another one again.
Why Pilea Leaf Propagation?
Pileas are a perfect beginner plant because they don’t need much light and can tolerate low-quality soil. They’re also one of the most affordable plants you can buy, so propagating them from leaves is an easy way to save money on your next purchase!
Steps For Propagating Your Leaf
Step One: Find an old leaf
The first step is to find a healthy, old leaf from your pilea plant. Make sure the leaf has not fallen off of the stem and that it’s still connected to the main plant by its petiole or “stalk.” You’ll need this stalk in order for your new plants to grow properly and stay living.
Step Two: Cut the leaf from its stalk
The next step is to cut off the old leaf. Make sure you leave a few inches of stem on it so that it stays fresh and moist for as long as possible. The best time to do this is in late fall or early winter when your pilea plant has gone dormant. This will give you plenty of time to propagate the leaf before growth starts again.
Step Three: Prepare a pot of soil for your new plants
The third step is preparing your pots with good-quality topsoil or dirt mixed with perlite, vermiculite, and peat moss in equal amounts. Fill each container one-third full with the soil mixture and create a small hole in the middle of it.
Step Four: Place your leaf into the pot
The next step is to place your cut leaf inside one of the pots you just prepared with new soil, making sure that its petiole remains intact as well. The plant will be placed about two inches deep within this container.
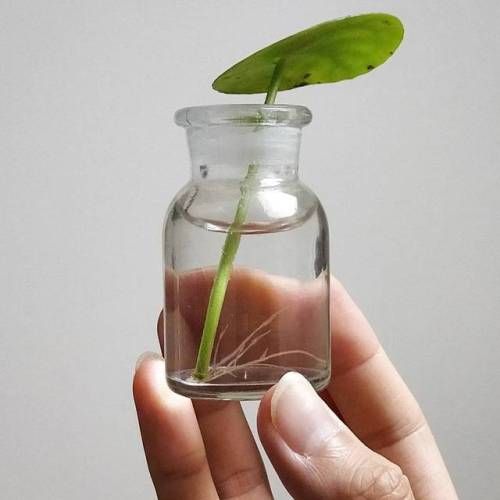
Step Five: Water the leaf and wait for new growth to start
The last step is watering your leaf. It’s important not to overwater this time around, which can cause rot or a plant disease called “root rot.” Fill up at least three inches of water in the pot with the cut leaf and allow it to soak up as much of that moisture as possible before you leave it be.
Eventually, new leaves will grow out from where you placed them within the soil! This may take anywhere between six weeks to four months depending on how quickly your plants are growing during their dormant period. Once they finally do sprout some more leaves, just transplant those into another pot using the same process we outlined above!”
Best Time for Propagating Pilea
If you’ve done all the steps listed above and your new plant is still not growing, it could be a sign that you’re planting them in too cold of an environment. If you live in a place where winter starts early and lasts for quite some time then try waiting until summer to do this process so that your pileas will have more energy from the sun!
How to Care For Your Pilea Plant
Now that you have your new plants, make sure to keep them healthy with these caring tips!
- Always water in the mornings or evenings so as not to let leaves dry out during the day.
- Keep soil moist but never wet. Opt for using a tray under the pot if possible because this will help better retain moisture and prevent it from evaporating too quickly.
- Change water every week by pouring fresh, clean water into the old container until the plant is submerged then dumping it all back out again like rinsing off dirty dishes.
Frequently Asked Questions
Q: What type of plant is a Pilea?
A: A Pilea is an indoor plant that thrives in low-light and moist environments. It’s also known as “Furry Philodendron” or “Mother-in-Law’s Tongue.”
Q: What should I do after it’s been a couple of months but my new plant is still not showing any signs of growth?
A: You may have cut off the old leaf too late into the fall season because this could prevent them from growing again before winter starts to set in! If you live in an area where winters last quite some time then wait until summer so that they will have more energy from the sun!”
Q: What’s the best way to water my new plants?
A: Make sure you’re watering in the morning or evening so that leaves won’t dry out during the day. It’s also important not to overwater this time around, which can cause rot or a plant disease called “root rot.” Fill up at least three inches of water in the pot with your leaf and allow it to soak up as much moisture before leaving it be. Eventually, new leaves will grow from where you placed them!”
Q: How often should I change their soil?
A: If using a tray under the pot then every week is optimal but if not then every two weeks may do. The goal here is for you not to overwater because overdoing it can lead to a plant disease called “root rot.” Try pouring fresh, clean water into the old container until the plant is submerged then dump it back out again like rinsing off dirty dishes!”
Q: How high should I place my pot?
A: The best height for your new Pilea plants would be on the ground as opposed to higher up since this will enable them to grow more easily. You don’t want their leaves getting too much sun exposure either so try placing them in front of some shade or else they may turn brown from overexposure.
Conclusion
The best part? Pileas are easy to propagate from leaves! In this article, we walked through how to take one leaf off your pilea plant’s stalk, prepare the soil for a new pot with cuttings inside it, water the newly planted cutting before leaving it alone while new growth sprouts up – usually within six weeks.


